Friday, March 4, 2011

tee-shirt cutting

Well, this is one of my quick and easy past times. I first got inspired to do this from Kat Von D, now more famously known in Australia for dating sandra bullock's ex! There are so many ways to do this, just try your ideas out on a few cheapies first to get an idea for how it all works.
I brought a $4.00 tee-shirt from target today in the boys dept, mostly because it had a zombie on the from and YES i am more than alittle obsessed with Zombie madness. The thing with living in a small seaside town is that shopping isn't real original. You have the chain stores and then a few boutiques, but nothing that you wont find someone else wearing at some point!
Soooo, i love buying Tee's that i know no-one else will be wearing and i often buy in the boys/mens dept and then bring out my scissors and design away!!!!
Todays creation....a zombie handmade designer Tee. So join me as i take you through my creative process...

Step 1. Find an orignial Tee-shirt thats close to your size it can be a tad small, as the cutting will make it looser.

Step 2. Cut out the neckine
Step 3. Cut off the bottom and the seam of the sleeves


Step 4. fold the Tee in half side ways so the sleeves are in the center and you can see half the front & half the back.
Step 5. Cut slices into the back about 1/3 of the way down leaving about an inch between each slice, you can make these the same size or from long to short or as i have done, larger to smaller to larger again. Do as many as you like, this will determine how much skin is viewed from the back.

Step 6. Stretch out the cuts in order to make them curl and not fray.


Step 7. Stretch out the edges of the sleeves and the bottom of the shirt. 


Step 8. Add any additional designs to sleeves you desired!

And now admire your work!

Have fun creating your own one of a kind designer Tee's!
Joanna xo

Wednesday, March 2, 2011

MY foundation routine


I have several issues with my skin! It is highly pigmented, and ruddy, i have freckles, occasional breakouts and uneven skin tone. So if i can make my skin look naturally radiant, then so can you.
Here is what i do when i am wanting a flawless foundation look. This may seem like alot of effort to some of you, but once you have it down pat it really takes no time at all. Plus the results are more than worth it!

Lets go!

step 1. Cleanse face with regular cleanser, and for an extra clean finish add some bi-carb to the mix, it'll really brighten and clean your skin.

step 2. Apply a moisturiser or a face primer DONT do both unless you have very dry skin as makeup will start to slide off during the day. I would choose primer myself something with moisturising properties.


step 3. Apply a quick coat of your favourite foundation i love OCC's airbrush onesi use (y2 & y3 and also L'oreal true match in N4, i recommend always choosing a more yellow or beige based product rather than pink toned, no-one looks pretty with pink skin! You can use your hands, a brush a sponge or if you have it an airbrush.

step 3. Take a darker foundation in the same formulation or a stick one, (I'm using LA colours in mahogany it costs a few dollars) something 4-5 shades darker, and use this to contour the hollows of the cheek, around the edges of the face,and sides of nose if desired. Blend well. This gives our face a more demensional look. Go over this with a taupe coloured matte blush i love Nyx in taupe, blend well.


step 4. Use a smooth blendable concealer to cover any undereye discolouration, then take a lighter shade and blend over the front of the face in a triangle shape, using the side of the nose as a side of the triangle.  This highlights this part of your face and gives a flattering look. Again blend well. I use a blending brush for this as it gives a more flawless coverage, try Mac 217. Cover any additional blemishes at this time.


step 5. Set any concealed areas with a fine powder, i love makeup forever's HD one, but in a pinch cornflour will work a treat.

step 6. Use a cream blush to add life to the cheeks placement should be toward the outer third of the eye and towards the temple. Keep colour higher, let the contour shading do its job. Place a similar powder blush on top to set the colour in. I prefer to use something that has no shimmer i leave the glow for my highlighter.


step 7. Apply a cream illuminator above the blush in a small c shape, I'm in love with naploean Perdis illuminating wheel it has a great range of highlighters and a blush colour. working from about 2cms under eye and round towards the brow. Remember not to place this in wrinkles as it will highlight them! Once again set the look with a fine powder shadow in a similar hue, you want to aim for shimmer not GLITTER. You can also place this highlight on the bridge of your nose to straighten in and on your lips cupids bow to add volume to the lips.
step 8. Set the whole look by spritzing a setting spray over the face in a T then and X shape. DO THIS ONCE YOU HAVE FINISHED ALL OF YOUR MAKEUP. I like mac Fix + spray, and model in a bottle.
Give it a go and see how amazing you can make your skin, with a few extra steps that create a more natural, amazingly flawless canvas!

joanna xo

fun with zombie makeup

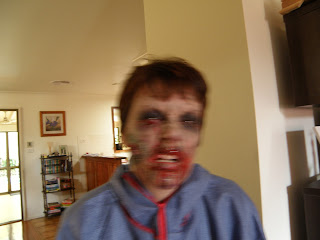
So it was a rare day off and i decided to spend some time creating a fun zombie makeup look, mostly because i like playing practical jokes on people!
My kids were home this day and they watched the transformation, which was a good thing as my son wasn't going anywhere near me when i was done...haha
Just goes to show how a few basic products can change someone quite dramatically. Stay tuned for a video prank utilising this look! Btw the prank ISN'T the video attached.


i hope you enjoyed this as much as i did!
joanna xo

DIY salon manicure

Well my day to day life as a cleaning company owner, wouldn't lead many to thinking i was into glamourous makeovers, but i do indulge in these more often than one would suspect!
My weekly relaxation ritual on a friday night in front of the t.v is to give myself a mani.
So today i thought i'd share my tips on having a salon perfect manicure at home.

I always start by exfoliating my hands with a scrub, any will do and if you dont have one on hand you can always make your own using some salt or sugar and olive oil. (just be sure to wash off the oil well)


Then i later on a richly scented moisturiser (being sure to avoid the nail area) i'm loving innoxa right now, great philosophy great product.


 After that its time to push back those cuticles using an orange stick and trim any excess skin with rounded cuticle scissers.


On to the polish, i always use a base coat that doubles as a shiney top coat. Maybelline have a great one for this. Apply one coat.
Apply your polish from the middle of the nail then one stroke on either side, this gives a less streaky finish. If your polish is beginning to thicken (due to air exposure) you can thin it down by applying a few drops of nail polish remover just add and test until desired consistancy is achieved.

Take your colour of choice and EITHER apply two coats, OR use a deep shade of brown, burgandy, or black under the colour to add depth and richness, or if you want the colour to be true to what it looks like in the bottle then apply an opaque white under instead. But whichever way you choose, you should now have 2 coats of colour (3 coats all up including base)

Finally apply your top coat.


And Va va voom, perfect salon DIY nails.
I can make these babies last a whole week whilst cleaning most days! Heres to happy mani's! joanna xo